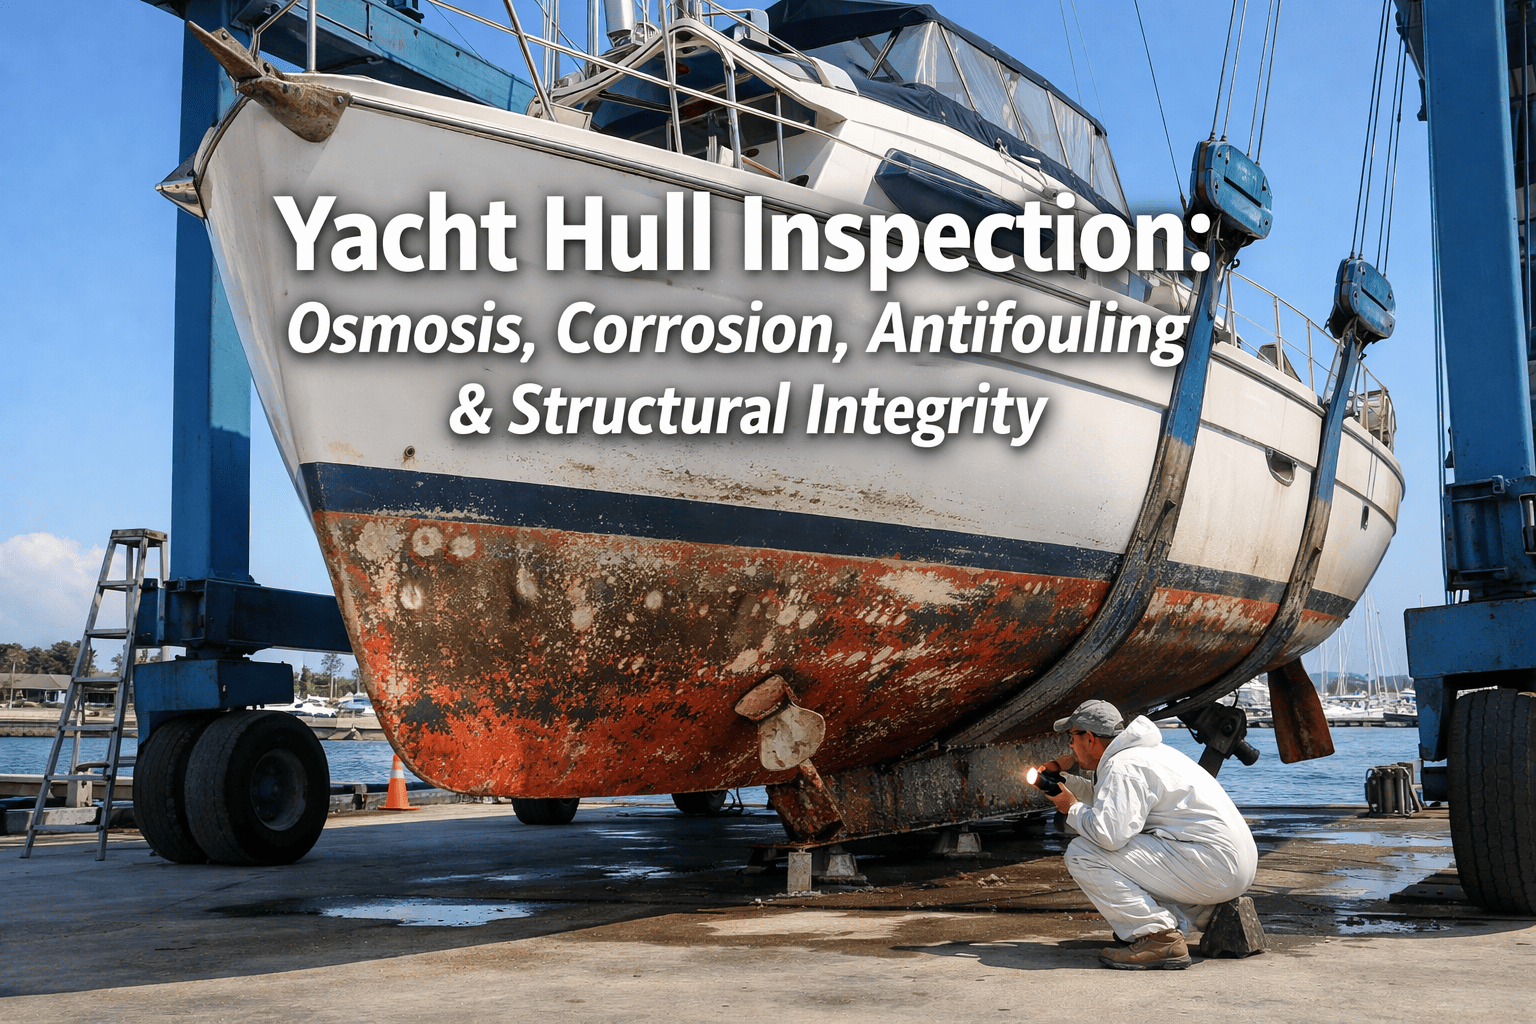
Your hull is the single most expensive component on your yacht — and the one most constantly under attack. Seawater, marine growth, UV exposure, and the relentless chemistry of osmosis work around the clock to degrade gel coats, saturate laminates, corrode metals, and compromise structural integrity. The damage often begins invisibly: water molecules migrating through gel coat into the laminate, corrosion advancing beneath antifouling paint, delamination developing where it can't be seen. By the time blisters appear or soft spots develop, thousands of dollars of damage may already exist. A proper hull inspection — using moisture meters, percussion testing, visual assessment, and ultrasonic gauging — catches these problems early, when they're repairable rather than catastrophic. Whether you're buying, insuring, or maintaining a yacht, this guide covers exactly what a thorough hull inspection reveals and what each finding means for your vessel's value and safety. Yacht owners and surveyors can sign up for Marine Inspection or schedule a demo to see how hull condition, moisture data, and maintenance history are tracked in one platform.
Yacht Hull Inspection: Key Facts
30mm
Moisture Detection Depth
Non-destructive meters penetrate through laminate layers
24+ hrs
Drying Time Before Test
Hull must dry before accurate moisture readings
$150–$500+
Per Foot Osmosis Repair
Full treatment cost — early detection saves thousands
Annual
Recommended Inspection
Underwater sections checked each haulout
The 5 Critical Areas of a Hull Inspection
A comprehensive hull inspection covers five distinct assessment areas — each using different techniques and revealing different problems. Missing any one can mean missing the issue that defines the vessel's true condition. Book a demo to see how Marine Inspection documents each area.
Highest Value
1. Osmosis Detection & Moisture Assessment
What it reveals: Water penetration through gel coat into the laminate — the precursor to blistering, delamination, and structural weakening. Moisture meters measure to 30mm depth non-destructively. Method: Systematic moisture meter readings across the entire underwater hull in a grid pattern. Elevated readings don't automatically mean osmosis — but they indicate risk. Visible blisters are assessed for location, size, and acidity of fluid inside. Critical rule: Hull must dry at least 24 hours after haulout (longer in cold/humid conditions) before moisture readings are reliable.
Highest Value
2. Structural Integrity & Delamination Check
What it reveals: Separation between laminate layers, gel coat disbonding, core saturation (in cored hulls), and structural weakness. Method: Percussion testing (tap testing) — tapping the hull with a hammer or coin and listening for pitch changes. A solid laminate produces a consistent tone; delamination creates a distinctly different hollow sound. Also: visual assessment for flexing, soft spots, concave/convex areas, and stress cracks. High-risk areas: Keel attachment, bow, stern, around through-hulls, and anywhere loads concentrate.
Important
3. Gel Coat Condition Assessment
What it reveals: Crazing (spider web cracks), stress cracking, impact damage, fading, chalking, and water barrier failure. The gel coat is the hull's primary waterproof membrane — when it fails, water penetrates directly into the laminate. Method: Visual inspection of the entire hull surface, above and below waterline. Antifouling may need to be removed in sample areas to assess the gel coat beneath. Key distinction: Cosmetic crazing (surface only) vs structural cracks (penetrating through the gel coat into the laminate).
Important
4. Corrosion & Metal Assessment
What it reveals: Galvanic corrosion on metal components, electrolysis damage, anode condition, and metal hull plating thickness. Method: Visual inspection of keel bolts, through-hull fittings, rudder hardware, shaft brackets, and anodes. For metal hulls: ultrasonic thickness gauging (UTG) measures remaining plating thickness non-destructively — identifying internal corrosion invisible from outside. Anodes: Should be no more than 50% consumed; fully consumed anodes = unprotected metal.
Maintenance Assessment
5. Antifouling & Underwater Systems
What it reveals: Antifouling paint condition, marine growth level, through-hull fitting integrity, propeller and shaft condition, rudder bearing wear, and bow thruster operation. Method: Visual inspection with assessment of antifouling thickness and effectiveness (heavy growth = paint failure or expired paint). Through-hull fittings tested for operation and condition — seized or corroded fittings are a sinking risk. All underwater appendages inspected for damage, wear, and security. Schedule a demo to see how Marine Inspection tracks antifouling application dates and through-hull servicing schedules.
Osmosis: The Silent Hull Threat
Osmosis is the single most important finding in any GRP/fiberglass yacht hull inspection — and also the most misunderstood. Here's how it develops, what the stages look like, and what each stage costs to repair.
Stage 1 — Moisture Ingress (No Visible Signs)
What's happening: Water molecules diffuse through the gel coat into the laminate — a natural process that accelerates with older or damaged gel coats. Moisture meter readings elevate but no blisters are visible. Action: Monitor annually. Apply epoxy barrier coating if readings are consistently high. Haul out for winter to allow drying. Cost to address: Barrier coating application — $30–$60 per foot.
Stage 2 — Hydrolysis Begins (Early Blistering)
What's happening: Water reacts with soluble compounds inside the laminate (hydrolysis). Acidic fluid builds pressure in voids, creating small blisters in the gel coat. Fluid inside blisters has a vinegar-like smell. Blisters may range from pinhead to coin-sized. Action: Gel coat removal in affected areas, drying, laminate assessment, then epoxy barrier system application. Cost to address: Targeted repair — $100–$250 per foot.
Stage 3 — Advanced Osmosis (Structural Concern)
What's happening: Widespread blistering, laminate saturation, delamination beginning. "Coffee staining" visible on inner hull surface. Laminate strength compromised. Core material (if present) may be saturated and rotting. Action: Full gel coat removal, extended drying period (weeks to months in controlled environment), laminate replacement where degraded, epoxy barrier system. Cost to address: Full osmosis treatment — $300–$500+ per foot. On a 40-ft yacht, this is $12,000–$20,000+.
Key Insight for Buyers
High moisture readings ≠ automatic osmosis. A well-manufactured hull using quality resin can show elevated moisture readings without any visible moisture-related defects. Conversely, a hull with low readings can still have localized problems. Moisture readings are an indicator that requires interpretation by an experienced surveyor — not a pass/fail test. Since the mid-1990s, isophthalic and vinylester gel coat resins have been widely used, making modern hulls significantly more resistant to osmosis than older polyester-resin boats. Book a demo to see how Marine Inspection stores and trends moisture readings over time.
Track Hull Condition Over Years — Not Just One Haulout
Marine Inspection stores moisture mapping data, inspection photographs, repair histories, and antifouling records — building the long-term hull condition picture that protects your yacht's value and safety.
Different hull materials face different threats. Here's what the inspection focuses on depending on your yacht's construction.
GRP
Fiberglass / GRP Hulls
Primary threats: Osmosis, delamination, gel coat failure, impact damage, stress cracking, core saturation (if cored). Key methods: Moisture meter survey (grid pattern, minimum 24 hrs after haulout), percussion testing for delamination, visual gel coat assessment, and patch testing (destructive) for osmosis depth if needed. Special attention: Cored sections (balsa or foam) — water entry into core can spread over large areas through voids between core blocks, even in synthetic foam cores.
Most common yacht hull material · Osmosis is the primary concern
ALU
Aluminium Hulls
Primary threats: Galvanic corrosion (especially near dissimilar metals), pitting corrosion, weld cracking, electrolysis from stray electrical currents. Key methods: Visual inspection for pitting and corrosion, ultrasonic thickness gauging at representative points and high-stress areas, anode condition assessment, and electrical bonding system check. Special attention: Areas around through-hulls, waterline, stern gear, and any location where dissimilar metals are in contact.
Excellent strength-to-weight · Corrosion management is critical
STL
Steel Hulls
Primary threats: Rust and corrosion (constant battle), plating wastage, weld deterioration, pitting. Key methods: Ultrasonic thickness gauging (essential — measures remaining plating thickness from inside or outside without removal of coating), visual assessment of coating condition, and internal bilge inspection for corrosion. Special attention: Waterline area, bilge areas, tank boundaries, and anywhere coating has failed. UTG can be done in-water if dry bilge access is available.
Strong and repairable · Requires continuous coating maintenance
WD
Wooden Hulls
Primary threats: Rot (wet and dry), worm damage (teredo), plank seam opening, fastener corrosion, frame deterioration hidden behind planking. Key methods: Moisture meter readings, percussion testing (tap testing — rotten wood sounds distinctly different from sound wood), probing/pricking at suspect areas, and visual assessment for discoloration, soft spots, and fungal growth. Special attention: Keel, stem, transom, deck-hull joint, and areas covered by linings or upholstery.
Traditional beauty · Requires most intensive ongoing inspection
Through-Hull Fittings: The Sinking Risk Most Owners Overlook
Don't Skip This
Every below-waterline through-hull fitting is a potential entry point for the sea. During hull inspection, every through-hull is checked for: operation (seacocks must open and close fully — seized valves can't be closed in an emergency), material condition (bronze valves develop dezincification; plastic valves become brittle with age), hose connections (double-clamped with proper marine-grade hose clamps), and hull attachment (properly bonded/bolted, no movement when tested). A failed through-hull while sailing has sunk more yachts than storms. Book a demo to see how Marine Inspection schedules through-hull servicing and replacement tracking.
Annual Hull Inspection Checklist
Use this at every haulout. Schedule a demo or sign up to run this digitally and track condition over years.
Haulout Hull Inspection Checklist
1
Allow 24+ hrs drying before moisture meter readings. Longer in cold or humid conditions. Ensure surface is completely dry — even hand moisture affects readings.
2
Moisture meter survey — Grid pattern across entire underwater hull. Record readings at consistent points for year-over-year trending.
3
Visual blister check — Inspect for blistering after pressure wash. Note location, size, and quantity. Open representative blisters to check fluid acidity.
4
Tap test entire hull — Percussion testing for delamination. Listen for pitch changes. Focus on keel area, bow, stern, and around through-hulls.
5
Gel coat assessment — Check for crazing, stress cracks, impact damage. Remove antifouling in sample areas if needed to assess gel coat beneath.
6
Through-hull fittings — Operate every seacock. Check hose connections (double-clamped). Inspect for corrosion, dezincification, and hull attachment integrity.
7
Anodes & corrosion — Assess anode consumption (replace if >50% consumed). Check keel bolts, rudder hardware, and shaft brackets for galvanic corrosion.
8
Keel attachment — Inspect keel-hull joint for cracking, movement, or water staining. Check keel bolt tightness and condition. Critical structural area.
9
Propeller, shaft & rudder — Prop for damage/erosion, shaft for corrosion and alignment, rudder bearings for play, and all underwater hardware for security.
Your Hull's History — In One Place, Forever
Marine Inspection stores every hull inspection report, moisture map, repair record, antifouling log, and through-hull service date — creating the condition history that protects your yacht's value for buyers, insurers, and your own peace of mind.
Osmosis is detected through a combination of non-destructive moisture meter readings (taken across the underwater hull in a grid pattern after at least 24 hours of drying), visual inspection for blistering, and percussion (tap) testing for delamination. Moisture meters can detect water presence up to 30mm into the laminate — catching problems before they become visible. If blisters are found, the surveyor assesses their size, location, and the acidity of the fluid inside to determine the osmosis stage. For advanced cases, destructive patch testing may be needed to determine how deep the moisture has penetrated.
Do high moisture readings always mean osmosis?
No. A well-manufactured hull using quality resin can show elevated moisture readings without any moisture-related defects — and conversely, a hull with lower readings can have localized problems. Surface moisture, paint type, ambient humidity, and insufficient drying time after haulout can all elevate readings. Moisture readings are an indicator that requires professional interpretation, not an automatic diagnosis. Modern hulls built with isophthalic or vinylester resins (common since the mid-1990s) are significantly more resistant to osmosis than older polyester-resin hulls.
How much does osmosis repair cost?
Costs vary dramatically by stage and extent. Early-stage barrier coating application costs approximately $30–$60 per foot. Targeted osmosis repair (gel coat removal, drying, recoating in affected areas) runs $100–$250 per foot. Full osmosis treatment on a severely affected hull — complete gel coat removal, extended drying, laminate repair, and epoxy barrier system — costs $300–$500+ per foot. For a 40-foot yacht, full treatment can reach $12,000–$20,000+. This is why early detection through annual moisture monitoring saves thousands compared to waiting for visible damage.
How often should a yacht hull be inspected?
Annual inspection of underwater sections is recommended at each haulout, including moisture readings, visual assessment, through-hull checks, and anode inspection. For pre-purchase surveys, a comprehensive hull inspection is essential regardless of when the last annual check was done. Yachts kept afloat year-round should be hauled annually for inspection. It's recommended to lay up ashore for 2–4 months each winter to allow the hull to dry — this both preserves the laminate and provides the opportunity for proper inspection.
What are the signs that through-hull fittings need replacement?
Replace through-hull fittings when: the seacock won't open or close fully (seized), bronze fittings show pinkish discoloration (dezincification — the zinc has leached out, leaving weak porous copper), plastic fittings show cracking or brittleness, hose connections are loose or corroded, or the fitting moves when lateral force is applied (indicating failed hull attachment). As a general rule, bronze through-hulls should be replaced every 15–20 years and plastic fittings every 10 years — but condition-based assessment during annual inspection is more important than age alone.